We use cookies to make your experience better. We use cookies and similar technologies on our website. Cookies are used for personalisation and by using the site you are consenting to them. You can manage your cookie settings via your browser setting at any time. Learn more about how we use cookies.

Quality Sewing Machines for sale throughout the UK.
With over 60 years of experience, Sewing Machine Sales are specialists in the supply of machines and accessories. Whether you are an experienced sewer or a complete beginner. If your passion is quilting or embroidery. If you want a trusted and established product from a leading manufacturer, something robust, reliable, and ready to stand the test of time, then search no further. We stock an extensive range of quality domestic sewing machines.


UK's Largest Sewing Machine Specialist.
No other UK website has so much choice, we have over 230+ different models to choose from and held in stock, ranging from just £100 up to the latest £14,000 top-of-the-line computerised embroidery models. We daily monitor internet prices to give our users the keenest prices as well as our 5* service.

Extra Value
We try to add extra value when a customer makes a purchase. Keep a look out for extra gifts on selected products. Extended warranty on others.
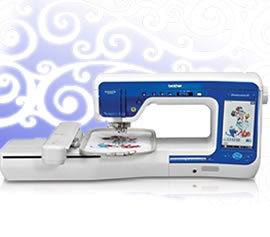

Sewing Machine Range
Choose your favorite brand or select one for your ability, beginner or advanced! either way, we can help you decide which sewing machine is best.

Knitting Machines
Get inspired with a new creative hobby, or join a fast-growing community of knitting by machine using the latest range of Silver Reed knitters.
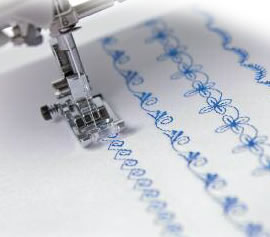
Sewing Machine Feet
Become a sewing foot genius. Its always best to use the correct foot for the task being sewn, whether gathering, buttonholes or inserting zips, its faster with the right attachment.
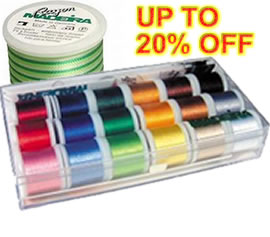
Threads
Wonderful colours and textures, bright summer autumn and winter shades. Sewing thread for quilting, embroidery overlocking and hand stitching.
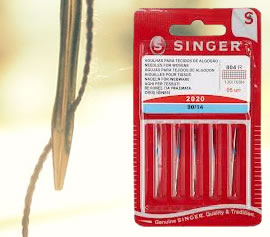
Sewing Machine Needles
Using a ballpoint needle to sew leather will end in tears, for leather we recommend using the special twist-point leather needle. For stretch fabrics, we advise...
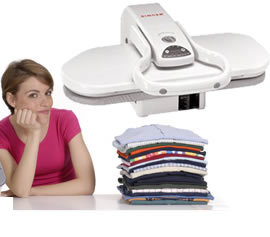
Ironing Press
It is fabulous for large pieces of linen and yes plenty of room on the end for cuffs, shoulders, and shirt collars. The rotary Irons are more for professional laundry and B&B's
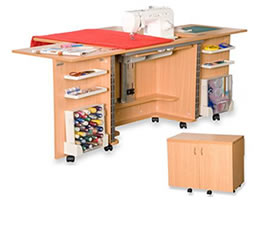
Horn Cabinets
Look after your precious sewing equipment, and store it safely and securely by using a specialist cabinet that doubles and a sewing table when in a working position.
Why choose a sewing machine from our company?
Apart from offering the largest choice of domestic sewing machines in the UK!
We offer a good value comprehensive and personal service. Our business has been built on recommendations and we are proud of the exceptional reputation we have for quality and competitive prices. We represent the UK with full after-sales and an extensive range of top-brand sewing machines authorised sales and aftercare for brands such as Singer, Janome, Brother, Pfaff, Baby Lock, and Husqvarna Viking.
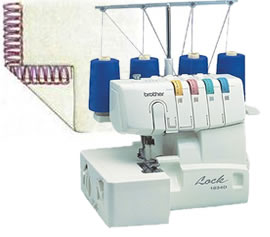
But that's not all... Have you ever considered a Steam Press? It could save you time and effort with your laundry. Or you might like a Horn Cabinet offering a larger workspace for quilting or storage for sewing accessories and sewing machine parts. What about an overlocker with its many time-saving advantages, extremely efficient and ideal for dressmakers?
We strive to meet our customers expectations and are never knowingly undersold on quality, service or price. We ensure that your experience of shopping with us will leave you completely satisfied, as many of our customers have told us. Our customer care and attention to detail is complemented by our extensive supplier list of schools, colleges and government departments.
SewingMachineSales.co.uk can deliver reliable and trusted products nationwide or via our speedy worldwide shipping service to your doorstep.
Whats New? Latest Sewing Products
 Hemline Iron Cleaner 60g
 Hemline Ironing Ruler: 30 x 10cm
 Ruby Star Society Starry Charm Pack by Alexia Abegg for Moda Fabrics
 Harry Potter Mystical Houses Fat Quarter Bundle
 William Morris Classic Fat Quarter Bundle
 Brother Needle Threader Link A Assembly
 Brother Needle Threader Guide Assembly
 Rotary Iron Nanofiber Cover - 85cm Wide
 Brother Needle Threader Link B Arm
 Hearts & Berries Yellow - Finding Wonder by Poppie Cotton 100% Cotton Fabric